3D Slicer
Introduction
3D Slicer is a free, open source software for visualization, processing, segmentation, registration, and analysis of medical, biomedical, and other 3D images and meshes; and planning and navigating image-guided procedures.
Download and Install
3D Slicer is available for Windows, Mac and Linux
You will likely want the ‘Stable Release’
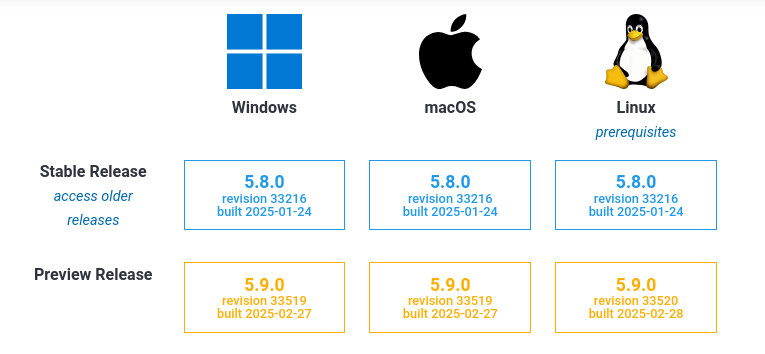
After downloading, install using your usual operating system method.
You may have to read and agree to their terms and conditions.
Tutorial
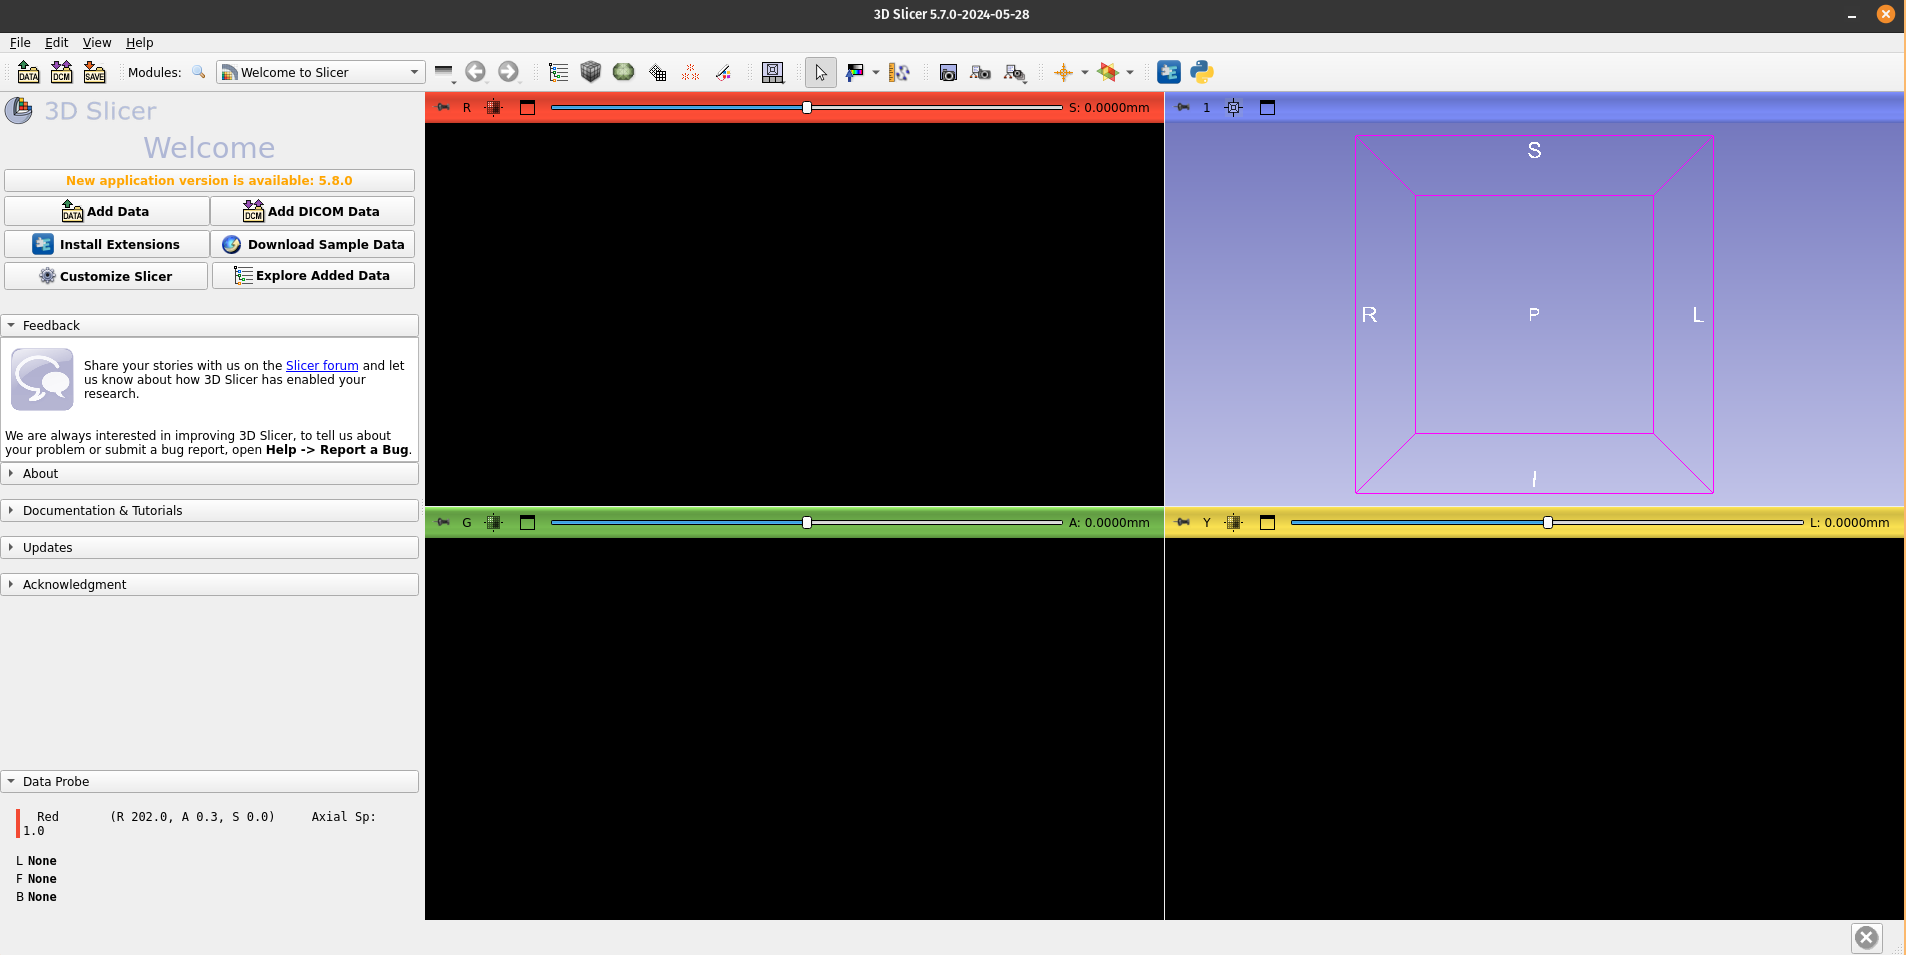
Now that 3D Slicer is installed, open it how you would usually open applications on your operating system.
This is how it looks when I first load it up [Note: it may look different on your computer depending on if a newer version has been released]
Loading Nifti Files
Many medical imaging files come in what’s called the ‘NIfTI’ format (stands for Neuroimaging Informatics Technology Initiative). These files will end in either .nii or a compressed version .nii.gz
To load a .nii or .nii.gz file:
File > Add Data > Choose File(s) to Add
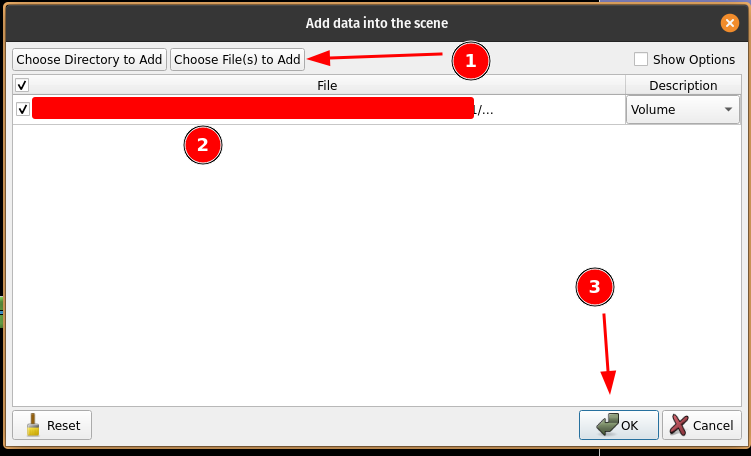
Now you should be able to view three different ‘slices’ of your brain: 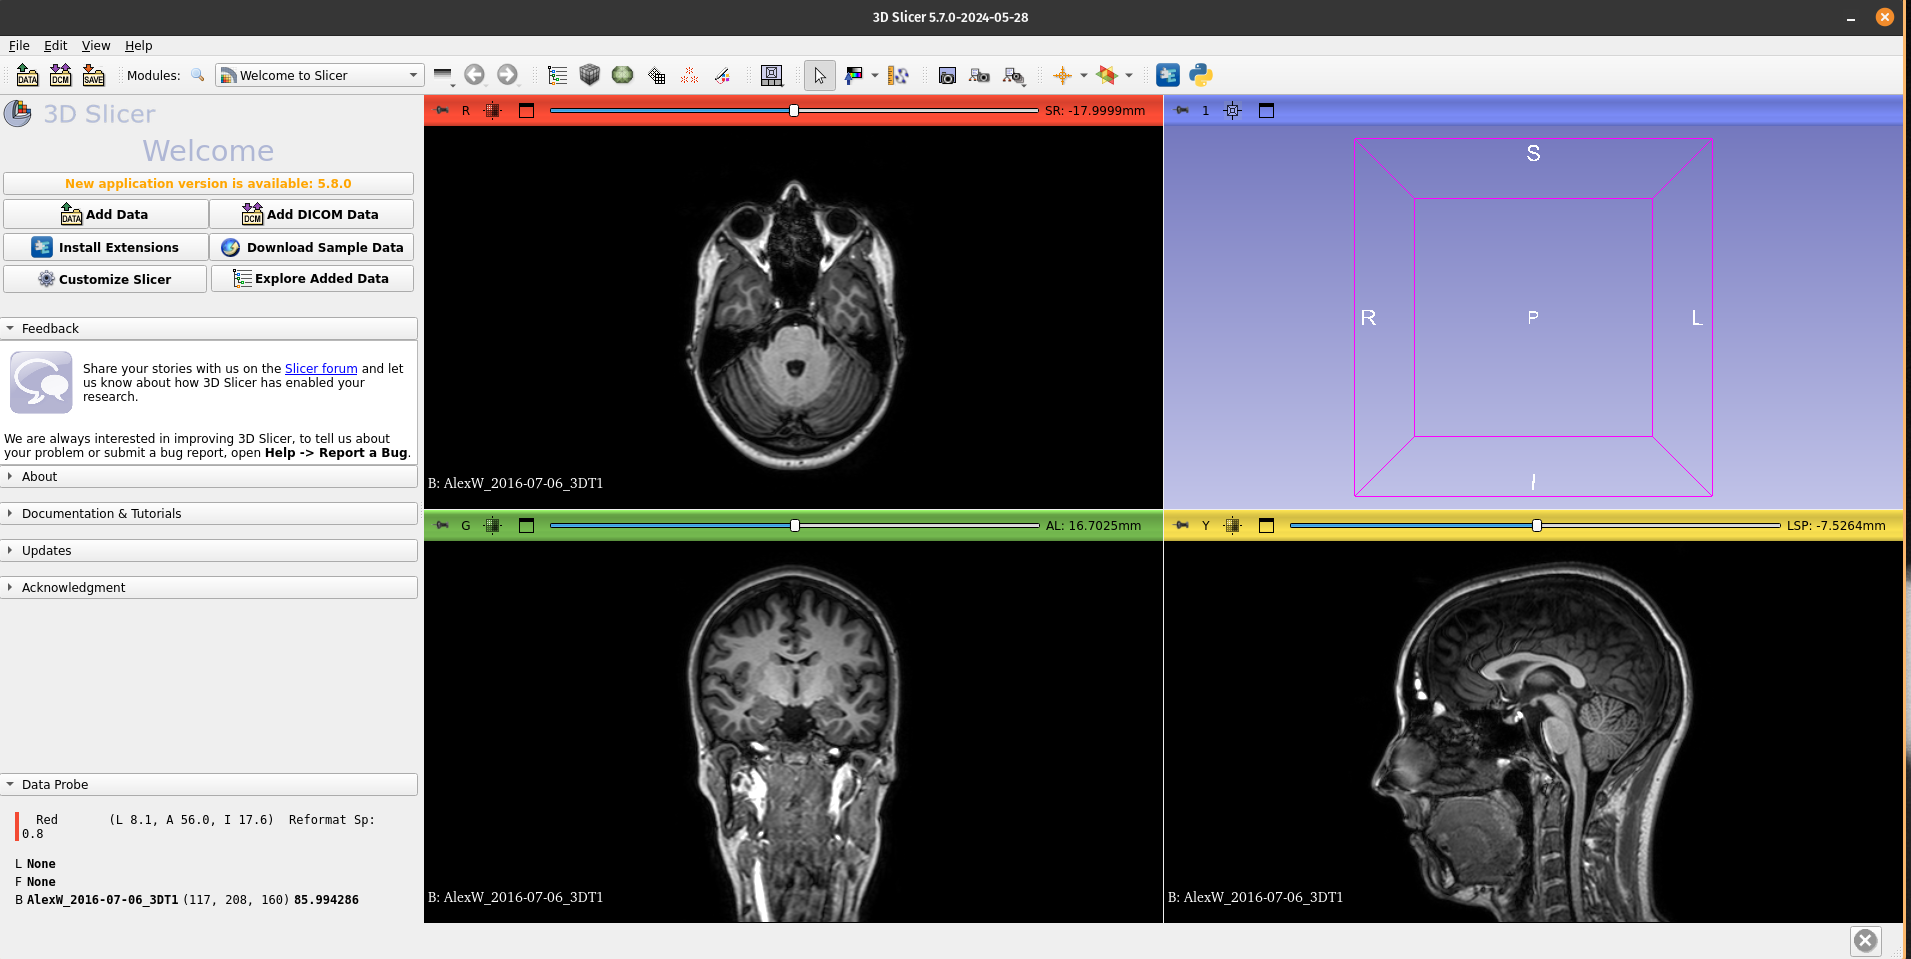
Using your mouse, hover over the view you want to interact with, and use your scroll wheel to navigate through slices. Or hold down CTRL while using the scroll wheel to zoom in.
To move the image around (in case you want to zoom into a particular area), hold down your scroll-wheel and move your cursor.
3D Rendering
Would you like to see your brain in 3D and perform a ‘virtual dissection’?
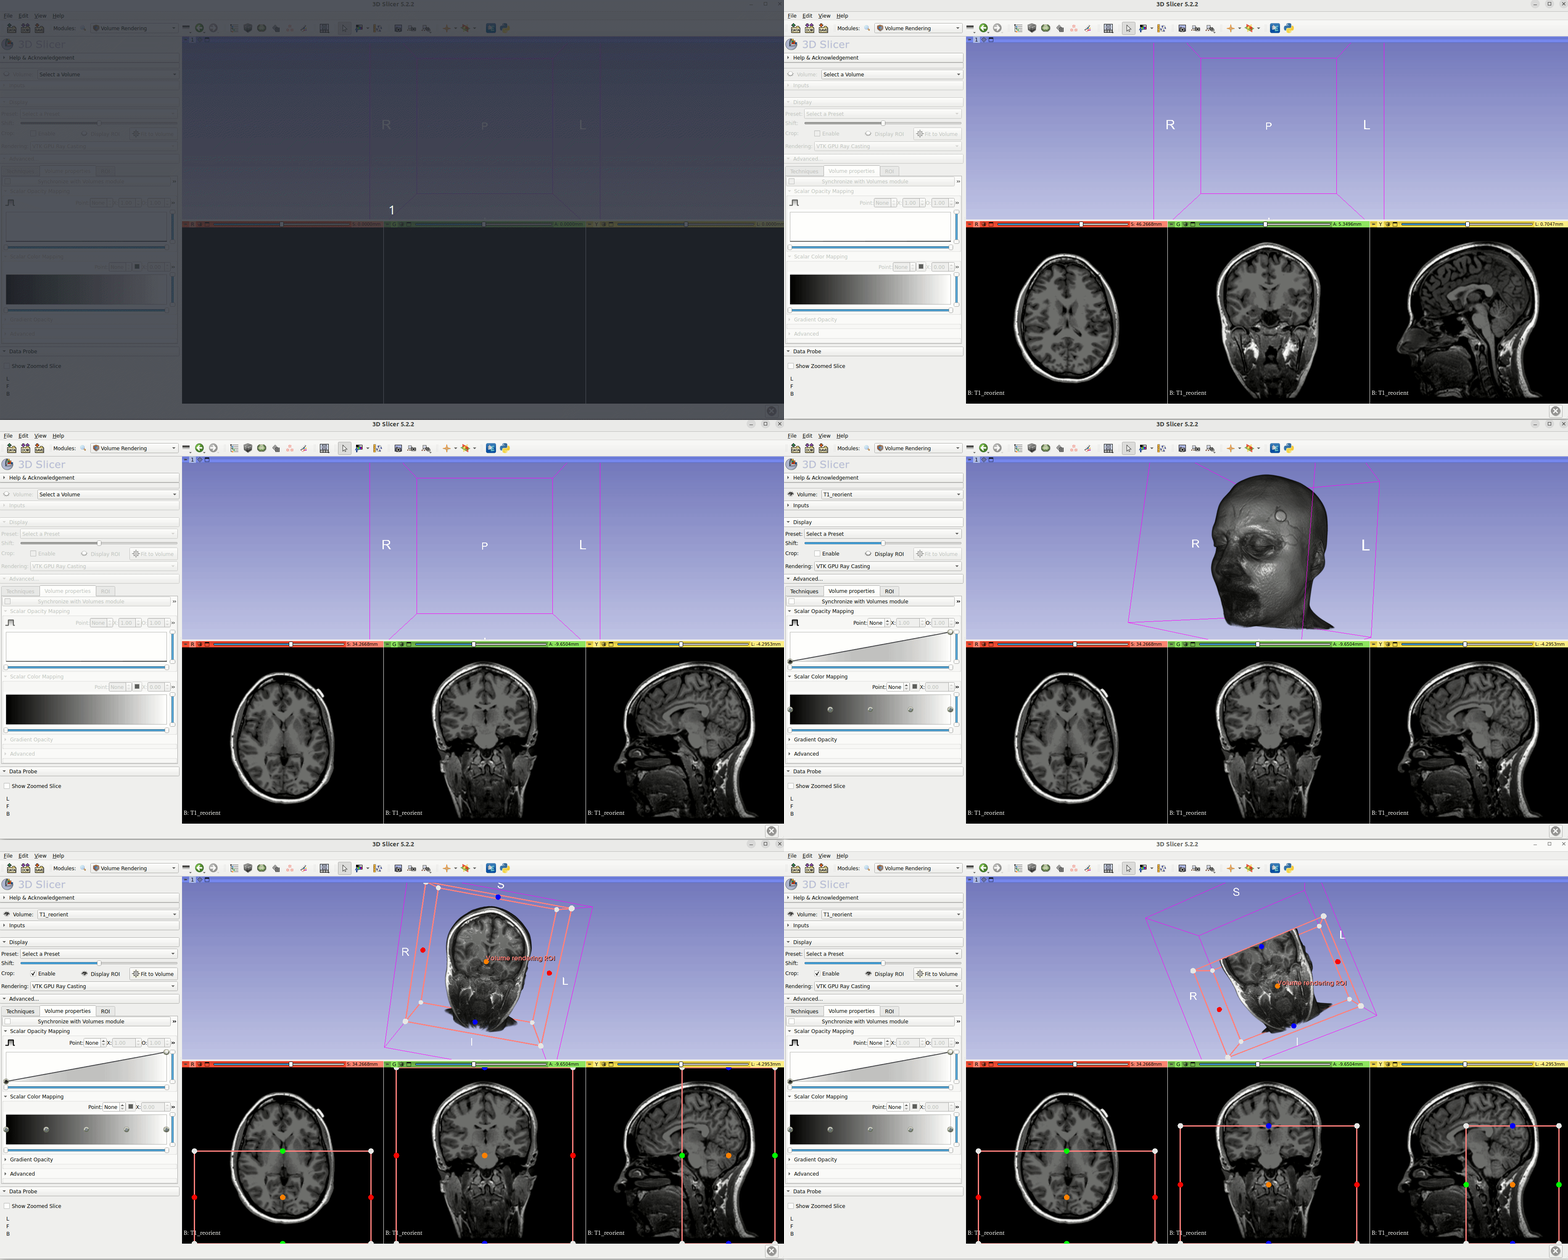
- Click on the "Welcome to Slicer" drop down menu (Top left)
- Click on "Volume Rendering"
- Click on the 'closed eye' in the top left (beside the name of the image)
- You can then do a digital dissection by clicking on Crop: Enable; Display ROI, then click on the green, red, blue whatever circles to move the planes to dissect
Here is a gif that shows these steps in detail [Note: if the image is too small, right-click, and press ‘Open Image in New Tab’]
More info: slicer.readthedocs.io/en/latest/user_guide/modules/volumerendering.html